
Faron Escape
LJA method
Theorized by ZFG1, discovered by Rachel
In front of the load zone to Hyrule Field from S. Faron Woods, there is a Midna text trigger forcing Link to stay in Faron until both Faron Twilight has been cleared and Forest Temple has been beaten. However, it is possible to LJA over this trigger to skip both requirements.
How to
- Stand with Link's left foot just in front of the two black spots on the ground (positioning is precise - see video)
- Target as far left as possible without targeting the fence
- LJA over the trigger (can LJA a second time with the same boomerang throw to hit the load zone to Hyrule Field)
There are several setups for Faron Escape, with Dragonbane's and sva's being the two most prevalent.
Human setup
by Dragonbane
Wolf setup
by sva
Displacement clip method (Wii only)
discovered by bdamja and InAMuffinCup
Using a displacement clip with a blue rupee, it's possible to clip out of bounds next to the upper entrance to Coro's house. Once past the wall, going north and jumping off the edge will pop you up to the roof, allowing you to jump over the high invisible wall on the left and escape Faron. Collecting the rupee is frame perfect. There are multiple different sets of targets that work for both setups; the goal of these sets is to both give yourself enough time to complete the position and angle setup and to minimize the oscillation of the rupee within the boomerang as much as possible, allowing for visual cues that are as consistent as possible. Remember that you need to have the blue rupee text not set for the trick to be possible, which can be done by going to the title screen. If you fail the trick by collecting the rupee, you must savewarp to retry (or just reset if you already made a save). If you fail the trick and don't collect the rupee, simply enter and exit the load zone of Coro's house from the upper corridor.
Iron Boots Setup
- Dash to the left of the dig spot (the further west one of the two)
- Aim at the black splotch on the wall (roughly angle 7000, not precise)
- Sidehop right, then angle roughly towards the scarecrow (not precise) and dig. The blue rupee won't always land in the same spot, but as long as it's roughly towards the scarecrow it will work
- Climb and Midna jump, then angle to the right and transform human
- Back into the wall and take out the boomerang, then aim all the way down and slightly to the right to target the rupee. You don't have to actually target the rupee; targeting near it works, as long as it gets picked up
- The rupee is on a timer, and if you release the rang once the rupee starts blinking, there's a chance it gets picked up on an invisible frame, making the rupee invisible for the entire rest of the trick (functionally the same, just worse cues). The only way to avoid this consistently is to do the targets quick enough. Assuming you did the Midna jump quickly, you have around ~4.1 seconds after transforming before the rupee starts blinking, and ~6.1 seconds before the rupee disappears altogether. If learning on TPGZ, it's recommended to turn on "disable item timer" in cheats until you're comfortable with the rest of the trick
- Place the 2nd target to the left of the patch of flowers (not precise)
- Place the 3rd target to the right of the patch of flowers, low on the wall (not precise)
- The point of the 2nd/3rd/4th targets is to buy time to do the position setup, and the 2nd and 3rd targets also intend to normalize the rupee so it doesn't oscillate in the boomerang. In general, placing targets further from each other will buy you more time to do the setup
- Place the 4th target on the ground far to the left (near the torch, but not quite as far away)
- Place the 5th target near the middle of the wooden part of the ramp. Don't place it too far right, or it might get caught on a wall on the way back
- Take out sword and roll off the ledge (Important: don't have boots equipped yet)
- If the targets were done well, you have roughly 10 seconds to do the setup after throwing the boomerang. This gives a cushion big enough to take your time finding ESS throughout the setup etc., but still requires going relatively quick
- You want to climb somewhere between z = -13235 and -13160. Too far positive (right), and the setup will put you in the load zone, and too far negative (left) won't put you next to the correct wall. Moving a little bit left or right while grabbing the ledge is fine. It's recommended to move before climbing, as moving to the side afterwards can mess up the X position
- Climb up, then wait a tiny bit for the animation to settle before holding a direction or performing any other input (x = -12665.6006)
- Equip Iron Boots
- Target, then hold ESS forward and slash to do a stab (can also c-up then slowly look down and target slash). Keep holding the direction on the stick to "abridge" the animation (x = -12654.9258)
- Turn around, then target (angle = 49152). Wait a few frames before targeting, or else you'll get the wrong angle
- ESS down and backhop (x = -12529.9258)
- Neutral target slash (can do this one immediately) (x = -12534.3701)
- Sidehop left twice (z = -13440 to -13515)
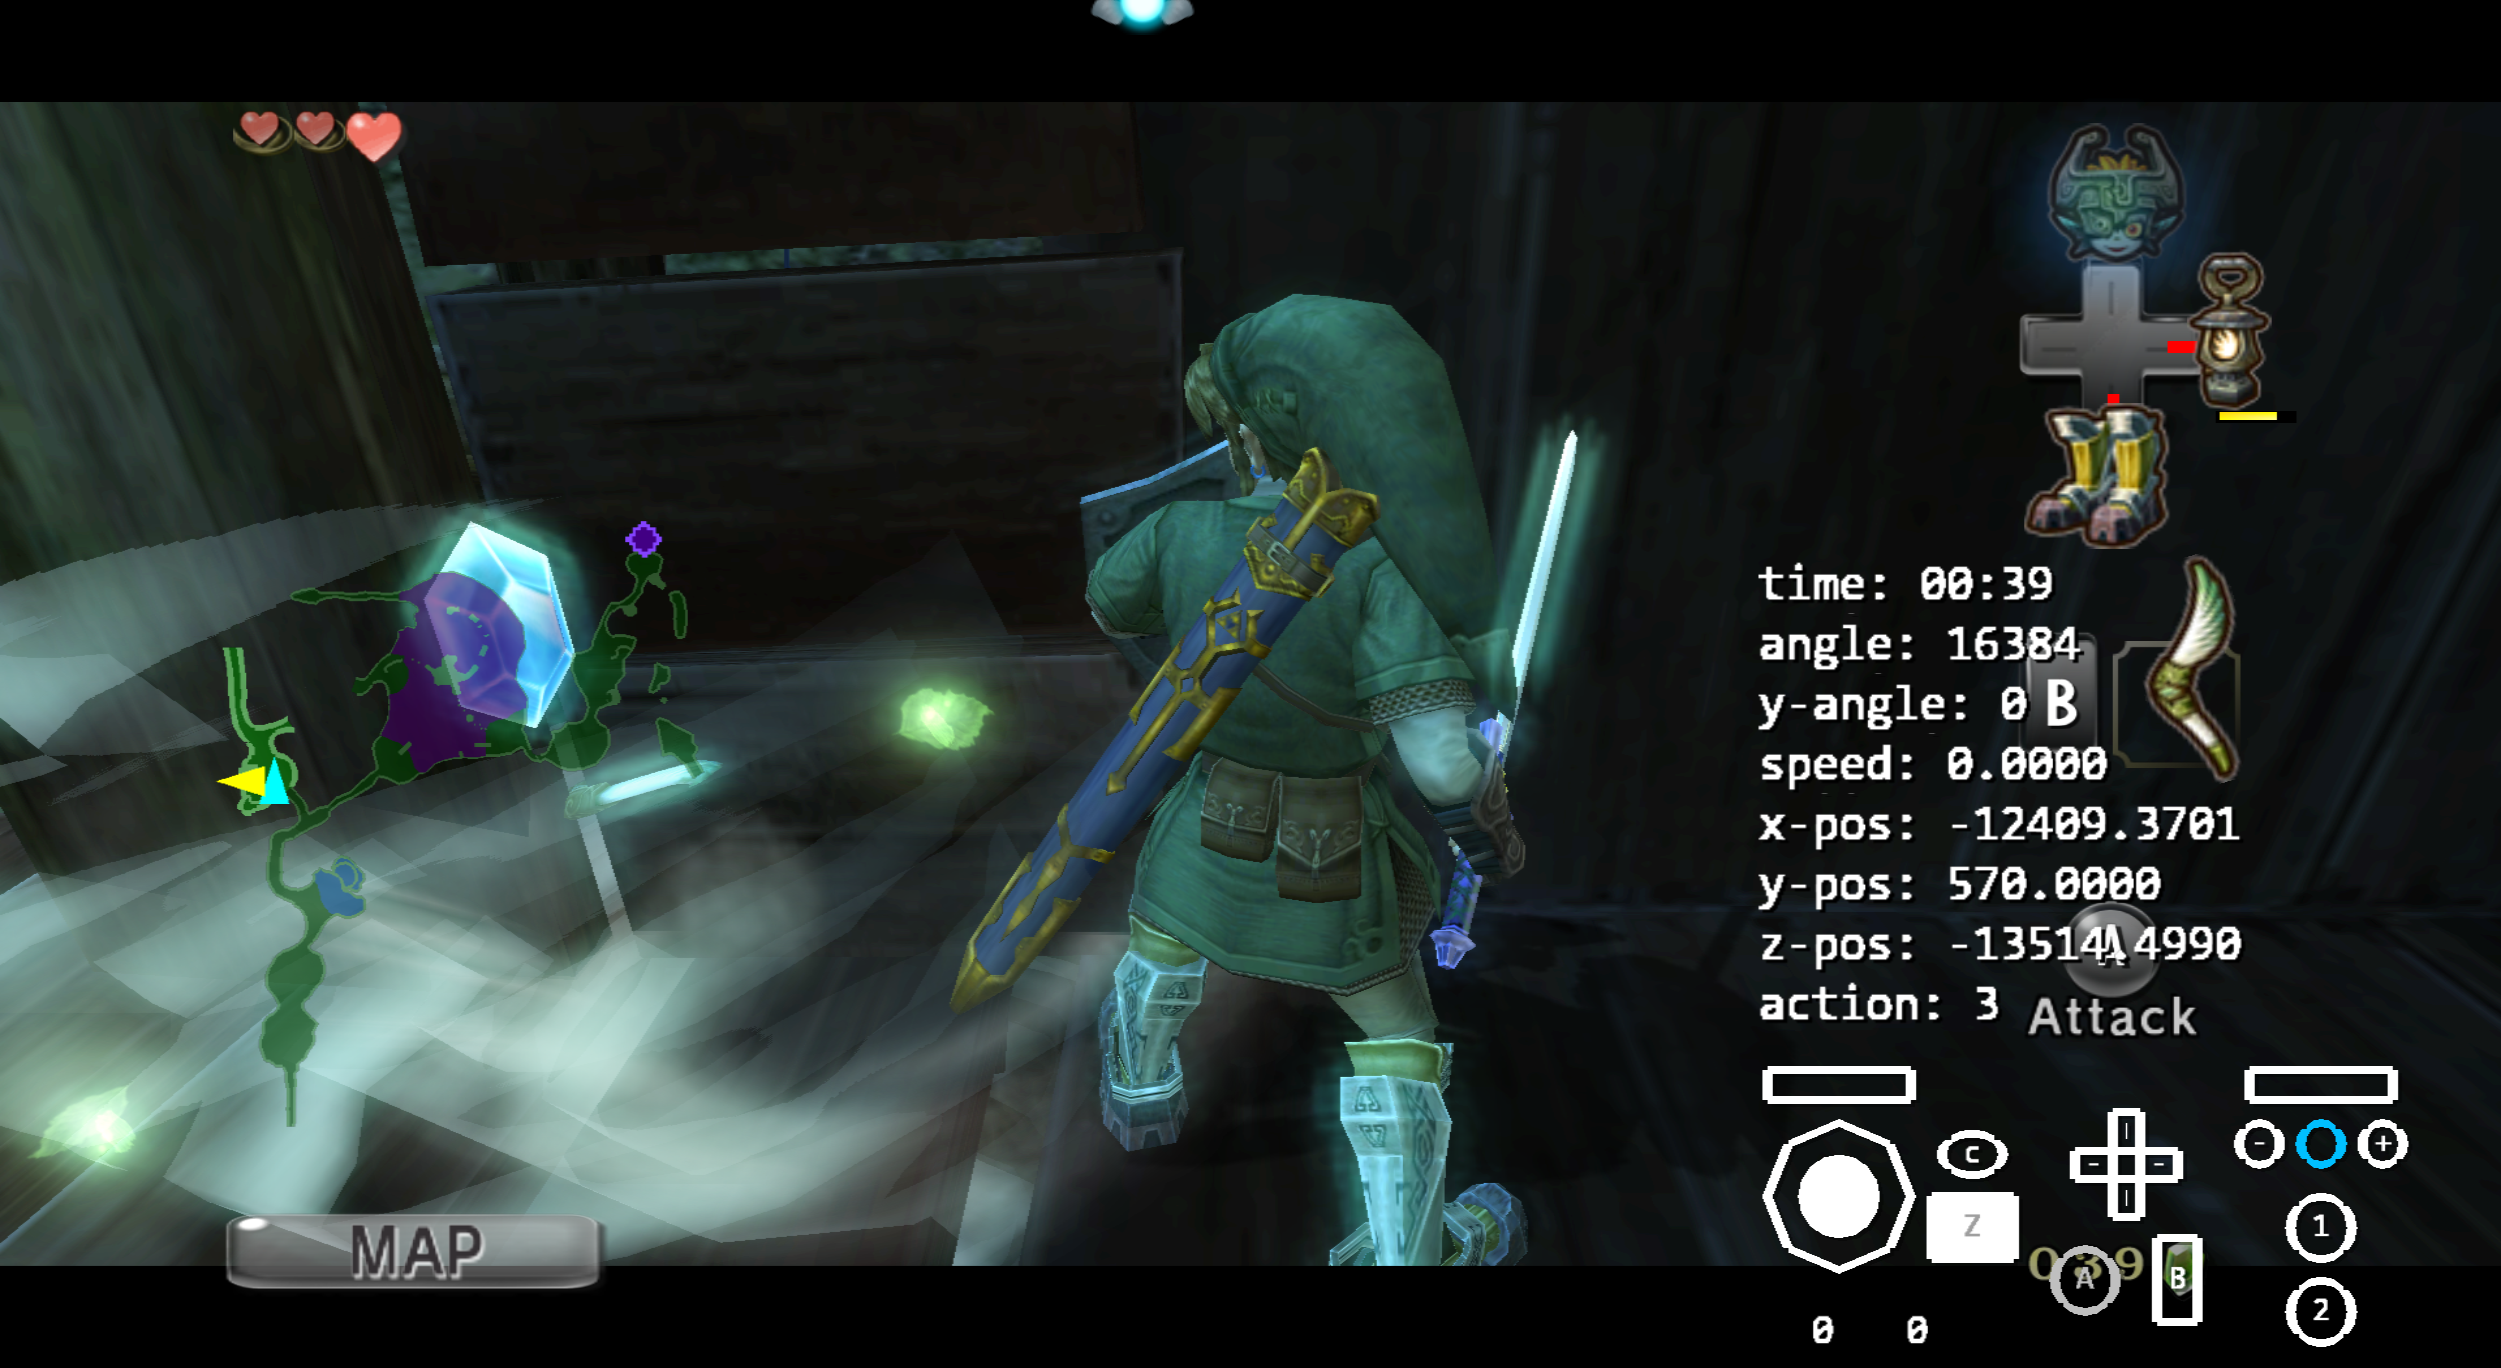
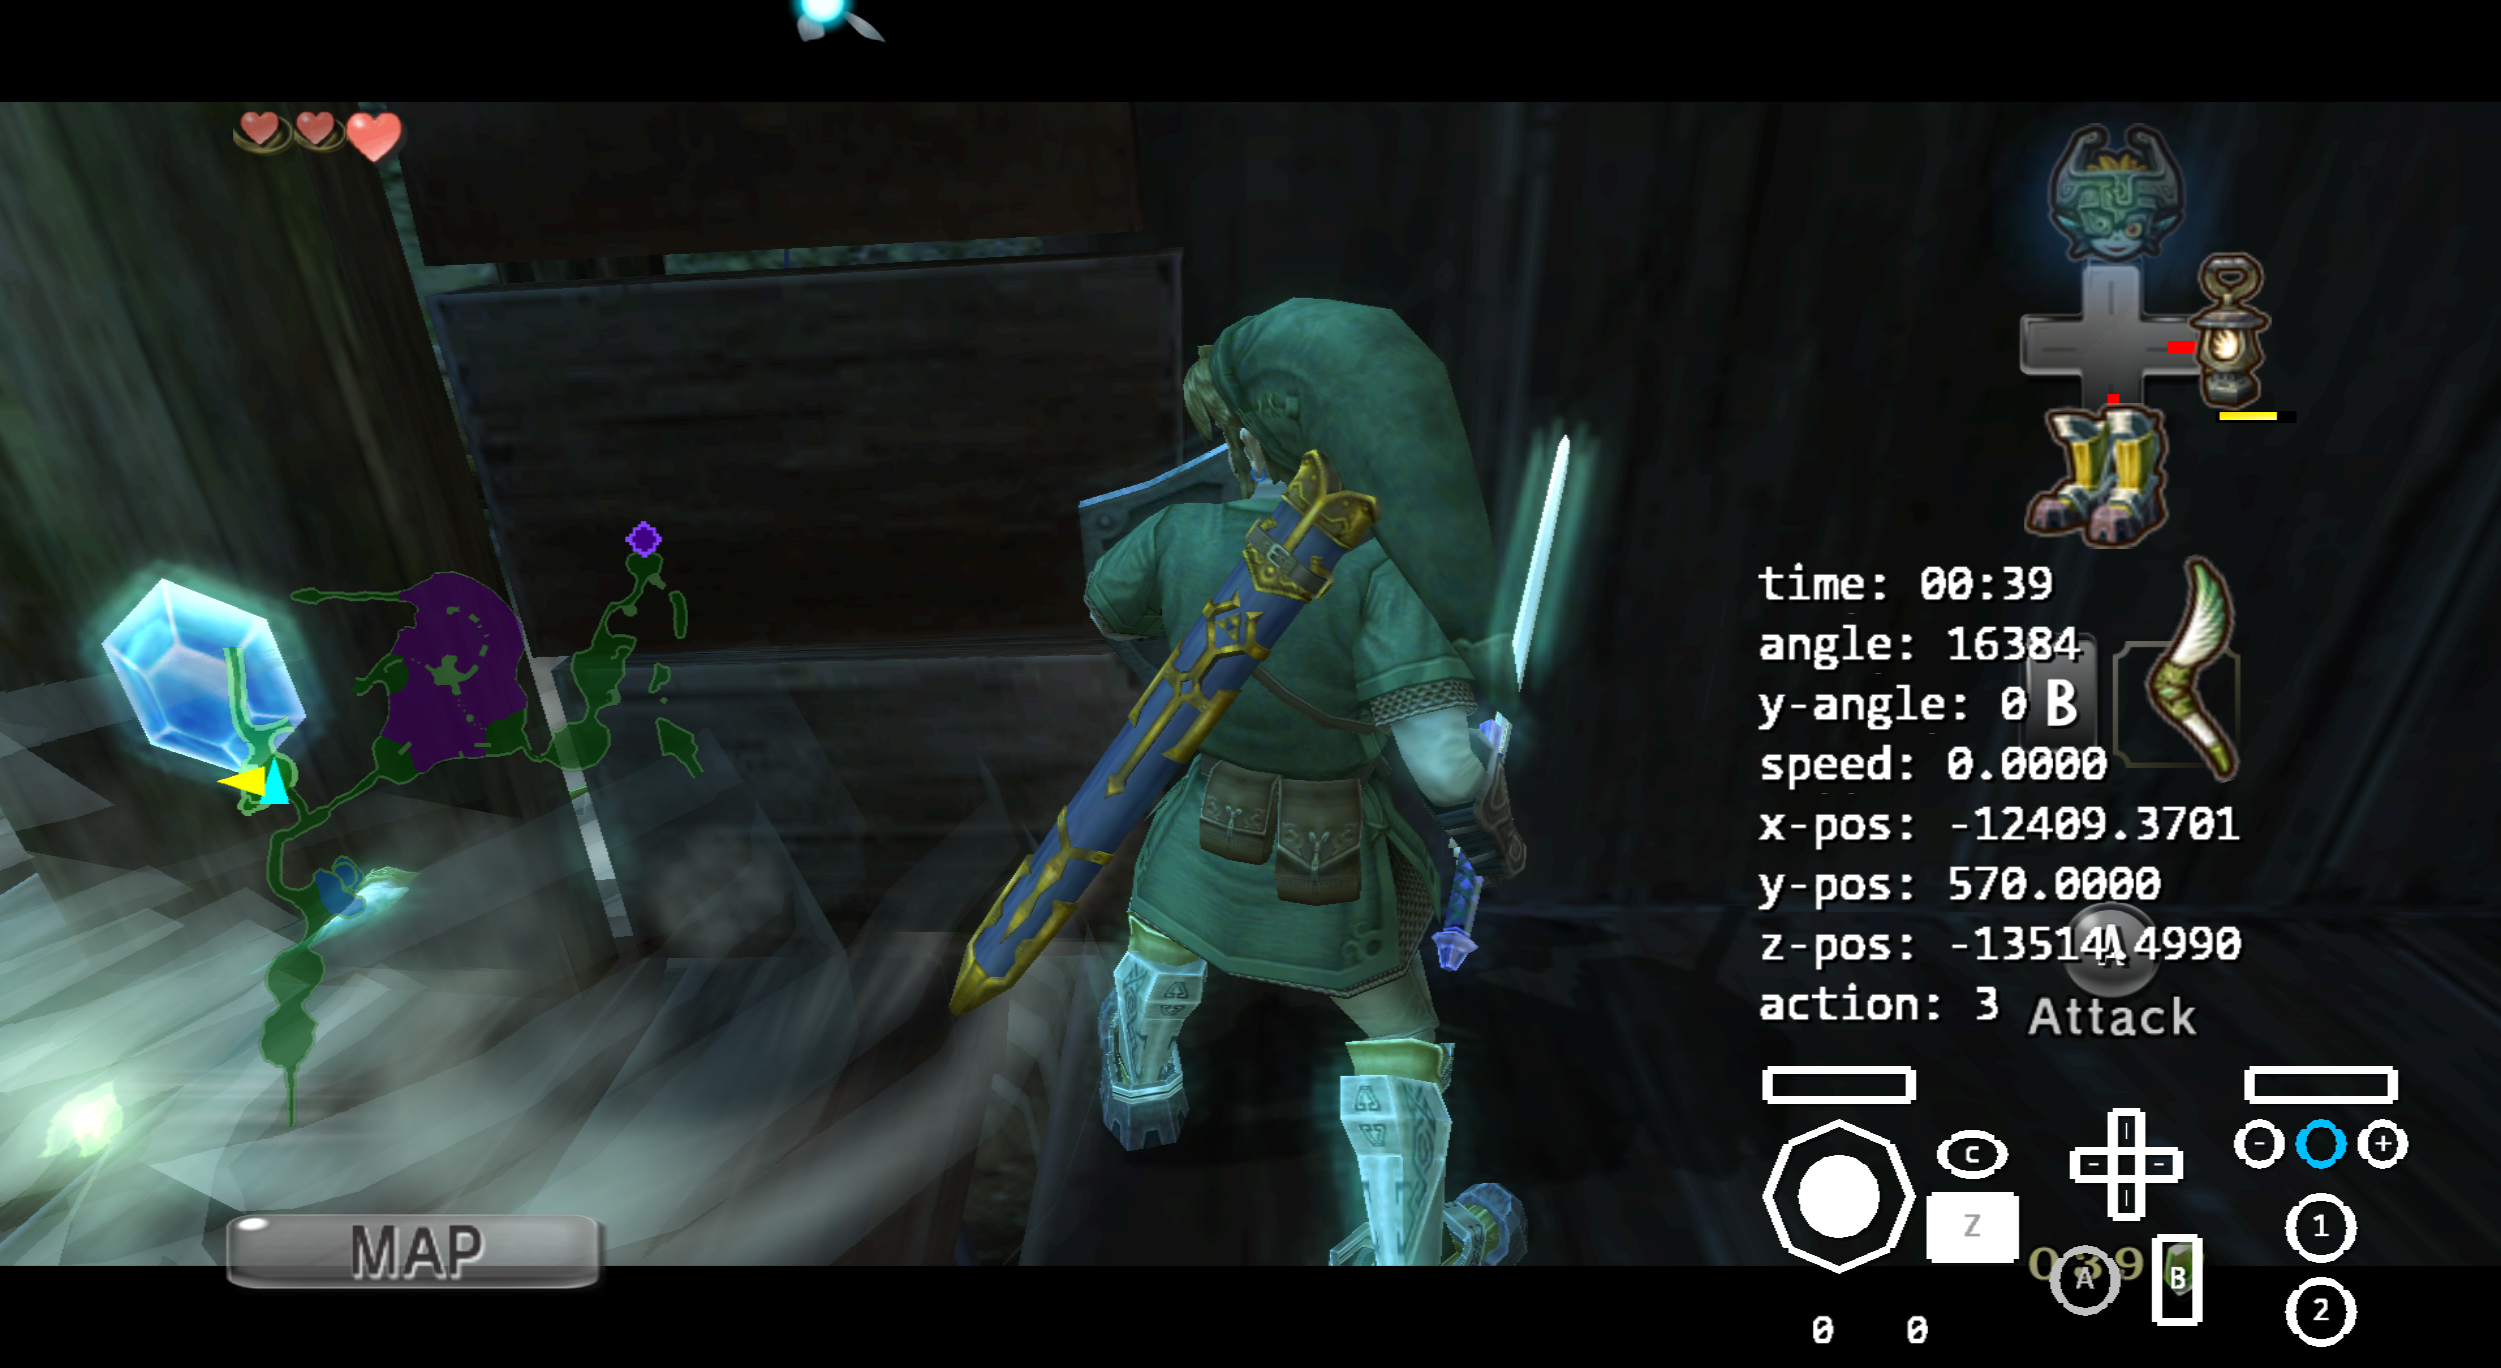
- ESS down and backhop (x = -12409.3701)
- Turn around and target (angle = 16384). Like before, wait a few frames before targeting or else you'll get the wrong angle
- Once you hear the boomerang getting close, begin opening and closing the item wheel to buffer. If the targets were done correctly, the rupee won't be oscillating very much (or at all) in the boomerang, allowing for consistent cues. The goal is to buffer until the rupee is 1 frame away from being collected, and then target slash immediately after closing the item wheel. You want to buffer until the boomerang is roughly adjacent to the left of Link. Note that it's possible to buffer after already collecting the rupee, so don't buffer too late / over buffer. Also note that you can't buffer frame perfectly in this game (perfect buffer is 2 frames), so if you end up with the rupee 2 frames away, you'll have to roll with it
- Example of rupee: 1 frame away, 2 frames away
- While holding target, close the item wheel and slash frame perfectly or 1 frame delayed depending on where the rupee is. It's worth timing the swing, as shaking the Wiimote in quick succession doesn't lead to consistent results, even if done very fast. It might be worth practicing the frame perfect slash or 1f delayed slash by itself until you get it down (it's a frame perfect slash if Link starts the slashing animation the first frame the map starts to fade in). Also consider using a metronome (220 bpm)
- If done correctly, Link will move a tiny bit (onto the wall seam) and immediately collect the rupee. If the rupee is collected after the sword clanks, the slash was early. If a slash doesn't come out, either the slash was late or the rupee had already been collected by the time you buffered to that frame. If the rupee is collected on the correct frame but Link isn't on the seam, then the position or angle was wrong
- Target, then with the boots still equipped, ESS sidehop to the right (it will result in a left sidehop due to the unusual camera)
- You're now on the floor outside of the walls of the corridor. Angle roughly north (not precise but not trivial), then transform wolf. Walk forward for a few frames at least, then dash off the ledge
- You should pop up to the roof. Dash off the ledge again while holding roughly up-left to jump over the invisible wall. From here, dash straight along the upper cliff until you reach the load zone. Be careful of the Midna trigger, as some of it extends onto the cliff.
No Iron Boots Setup
- Dash to the rightmost dig spot and line up close to parallel with Coro's house. This is not precise.
- Sidehop right into the corner, hold left for a few frames and dig.
- The rupee should end up somewhere targetable under the upper ledge. Dodge it on the way to the climbable ledge in front of you.
- Climb, Midna jump, and transform human.
- Turn around in place and take out the boomerang. Aim all the way down and towards the bottom left corner of the Z button to target the rupee.
- Place the 2nd target around the patch of flowers.
- Place the 3rd target near the first target.
- Place the 4th target near the patch of flowers again.
- Place the 5th target near the middle of the wooden part of the ramp. Don't place it too far right, or it might get caught on a wall on the way back.
- Roll off the ledge and climb up. Target while climbing to get angle 16384. Z position does not matter.
- Climb up and press C.
- Angle buffer two frames left to angle 15360. Visual cues will differ based on your Z position, but it is usually easy enough to tell if you buffered an extra frame or not. You have plenty of time to correct this if you went too far.
- Exit first person while holding Z to return to a neutral state faster.
- Do two turnarounds slow enough to not abridge either of them. You should be at angle 48187 after the first and 15510 after the second.
- Hold Z and walk forwards into the railing in front of you. Z position is again unimportant. Make sure that you do not begin holding forwards before you are fully targeted, otherwise you will mess up your angle.
- Do a one frame left curved roll to angle 14510. To do this buffered, press A and minus on the same frame, buffer two frames, hold left and close the item wheel. You can also do this unbuffered, although it is not recommended.
- If you fail this once, you generally have time to attempt it again assuming your targets were spaced out enough. Your position after bonking also happens to be close enough to attempt the exact same buffered setup.
- Sidehop right, release target, and pull sword. The position you end up in is not at all precise; this simply gives you a way to both quickly reach a better position and pull sword.
- Target walk forwards into the wall.
- Continue holding target. Once you hear the boomerang getting close, start buffering.
- Buffer until the rupee is either one frame or two frames from collection.
- Slash either frame perfectly after closing the item wheel or one frame late respectively.
- If done correctly, Link will move a tiny bit (onto the wall seam) and immediately collect the rupee. If the rupee is collected after the sword clanks, the slash was early. If a slash doesn't come out, either the slash was late or the rupee had already been collected by the time you buffered to that frame. If the rupee is collected on the correct frame but Link isn't on the seam, then the position or angle was wrong.
- Hold target and up right, then close the rupee textbox. Because of analog glitch, you will walk until you grab the ledge.
- Climb the ledge, press C and line up the left side of the C button with the wooden pole.
- Transform wolf, walk forward for a few frames and dash jump twice. If you dash too early before the first jump, you will not get a proper dash cancel and you will have to wait to dash for the second jump otherwise you cannot make it.
- Land on the upper cliff and dodge the Midna trigger on the way to the Hyrule Field loading zone.
There are two working sets of angles for clipping without iron boots: 14496-14511 and 18264-18278. Above is a setup for the first range, as it typically allows for better visibility of the boomerang and the rupee for the slash.
Epona and jump attack (any version)
It is possible to position Epona near the gate in such a way that a jump attack will result in Link getting pushed into the gate by Epona. It is then possible to bonk out like in Ordon Gate Clip. Note that this gate is only present prior to rescuing Talo on Ordon Day 2.
Epona Clip into Hyrule Field (GCN only)
It is possible to clip into the gate by positioning Epona close to it and backflipping. It is then possible to bonk out like in Ordon Gate Clip. Note that this gate is only present prior to rescuing Talo on Ordon Day 2.